Day 1: The Dark Room
The dark room might not even be dark when you first enter. If it is dark, make sure no one is inside performing an experiment. Once you’ve checked, you may turn on the lights — but keep in mind that one of the fastest ways to make enemies in a microscopy lab is to turn on the light while someone is imaging.
Inside, you’ll see the microscope (it takes up most of the room), a surgical table, a computer desk, racks filled with mysterious devices, shelves of surgical tools, and countless unlabeled boxes containing — well, who knows what. Let’s start with the microscope.
Meet The Microscope
The picture below shows a two-photon microscope (TPM) with some annotated parts. To begin we will need only the stage, on which you put your sample, the objective, which shines the laser light on the molecules and collects the fluorescent light, and detectors, which help tranform fluorescence photons into digital images.
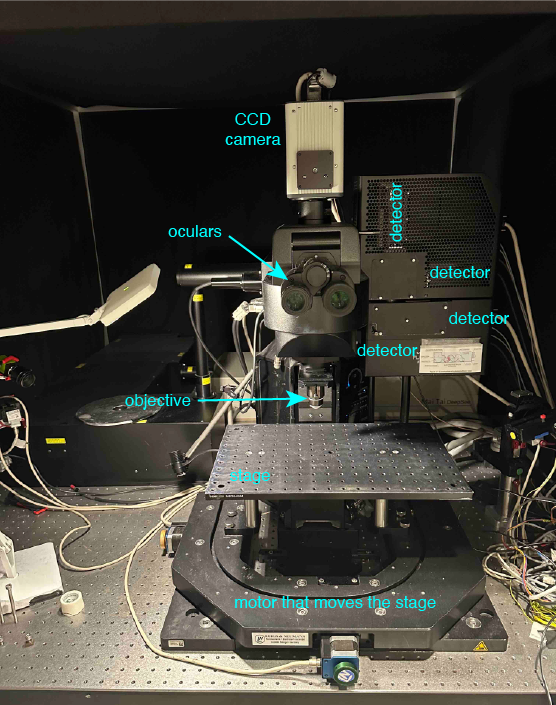
What does a microscope do? It magnifies small things so that we can see them. There so many types of microscopes and they all differ, e.g. in how they visualize small things. TPM and other types of fluorescent microscopy visualises molecules by catching photons (called in this case fluorescence) the molecules emitted.
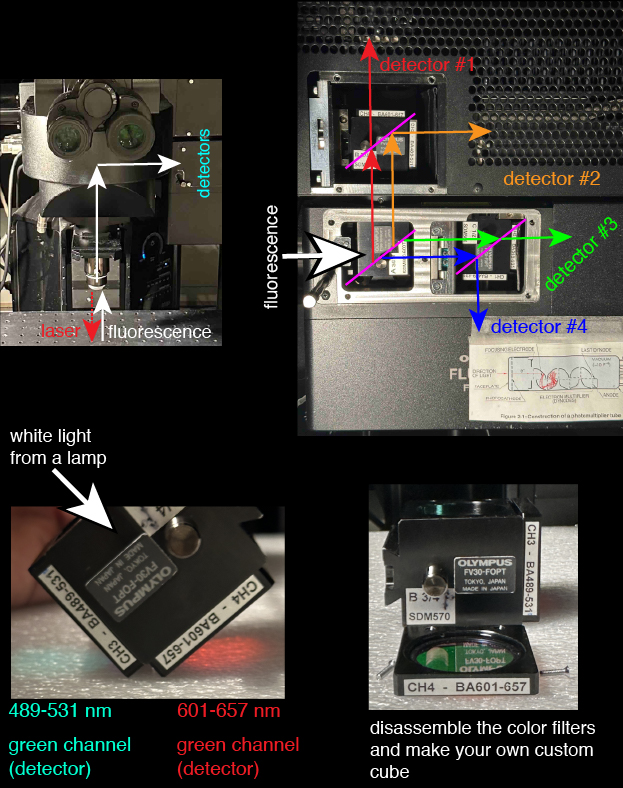
How does the microscope “see” different colors?
Now lets discuss how the microscope “sees” different colors of fluorescence.
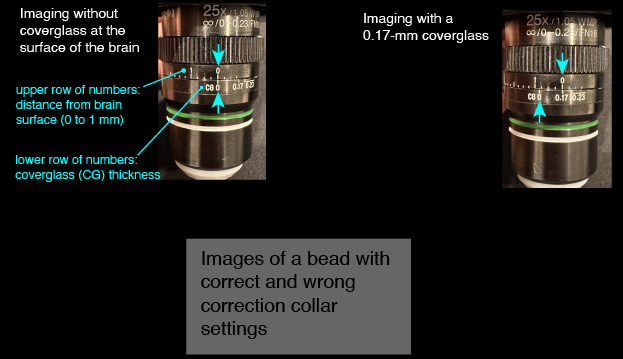
The objective and its correction collar